The Raspberry Pi is a powerful mini-computer used for everything from coding projects and media servers to smart home automation.
But when it comes to remote access, many users hit a wall, especially if their Pi is behind a NAT (Network Address Translation) setup.
NAT helps secure your home network, but it also blocks outside devices from connecting to your Raspberry Pi, making remote control difficult – something you don’t want!
In this blog, you’ll learn four easy methods to connect to your Raspberry Pi remotely, even behind NAT. I will walk through all the steps with tools like Remote.it, Tailscale, Reverse SSH, and a beginner-friendly solution using SuperFree VPN.
Cool. So, let’s make your Pi accessible remotely.
How to Access Raspberry Pi Remotely [4 Methods]
Here, I’ll explain four simple methods (including using SuperFree VPN) so you can access your Pi from anywhere in the world, without messing up your router.
Method 1: Use Remote.it
Remote.it helps you connect to your Raspberry Pi even if it’s behind a NAT or firewall, and the best part? You don’t need to touch your router or open any ports. It’s cloud-based and beginner-friendly.
Step 1: Install Remote.it on your Pi
Open Terminal on your Raspberry Pi and copy-paste this one line to install:
curl -L https://downloads.remote.it/install | sudo bash
Note: This will download and install everything automatically.
Step 2: Sign up on Remote.it
- Go to: https://remote.it
- Click Sign Up and make a free account.
Step 3: Register your Raspberry Pi
Once the installation is done, run this command:
remoteit
Follow the instructions shown on your screen. It will ask you to:
- Log in with your Remote.it account
- Add your device (Raspberry Pi)
- Select which services you want to access (like SSH or VNC)
Step 4: Access your Raspberry Pi remotely
Now go back to the Remote.it website, log in, and go to your dashboard.
You’ll see your Raspberry Pi listed there.
Click on the “Connect” button next to SSH (or other service) and it will give you a temporary address to use in your terminal.
Example:
ssh [email protected] -p 33000
Pros:
- No router or network settings needed
- Works anywhere (home, office, school)
- Easy to set up for beginners
- Secure and encrypted
Cons:
- The free version has limits on the number of devices
- Setup takes 5–10 minutes the first time
Method 2: Use Tailscale

Tailscale lets you build your own private network using WireGuard.
It creates a secure tunnel between your devices, like your Raspberry Pi and your laptop, so you can connect to your Pi from anywhere, just like it’s on the same Wi-Fi.
Follow these simple steps:
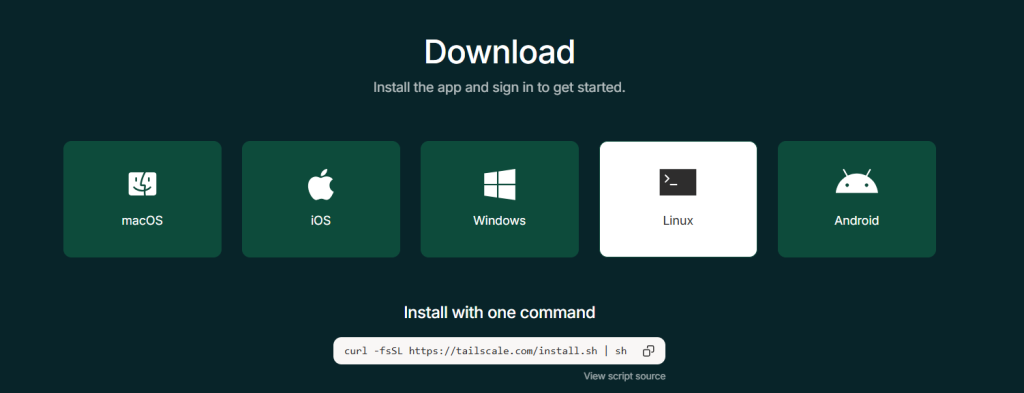
Step 1: Install Tailscale
Open the terminal on your Raspberry Pi and run the following commands one by one:
curl -fsSL https://tailscale.com/install.sh | sh
Now start Tailscale:
sudo tailscale up
Step 2: Install Tailscale on your other device (PC, laptop, phone)
- Go to https://tailscale.com/download
- Install Tailscale on the device you’ll use to access your Pi.
- Log in with the same account as your Pi.
Step 3: Connect to your Pi from anywhere
On your other device (like your PC or laptop), open the terminal and run:
ssh pi@<your-pi-name>.tailscale.net
Example: ssh [email protected]
Pros:
- Very secure (based on WireGuard)
- No router setup required
- Easy and fast – takes just 2–3 minutes to connect
- Works across all devices and operating systems
Cons:
- You need to be logged into Tailscale on both devices
- Free plan is limited to 3 users and 100 devices (plenty for personal use)
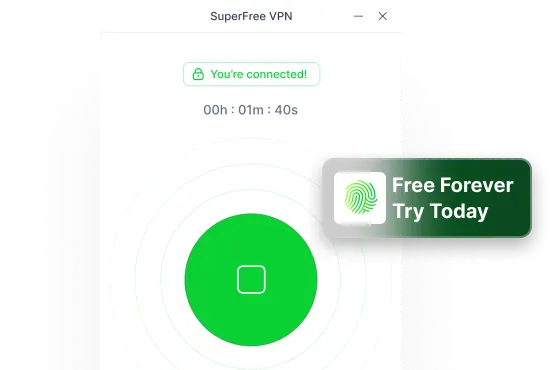
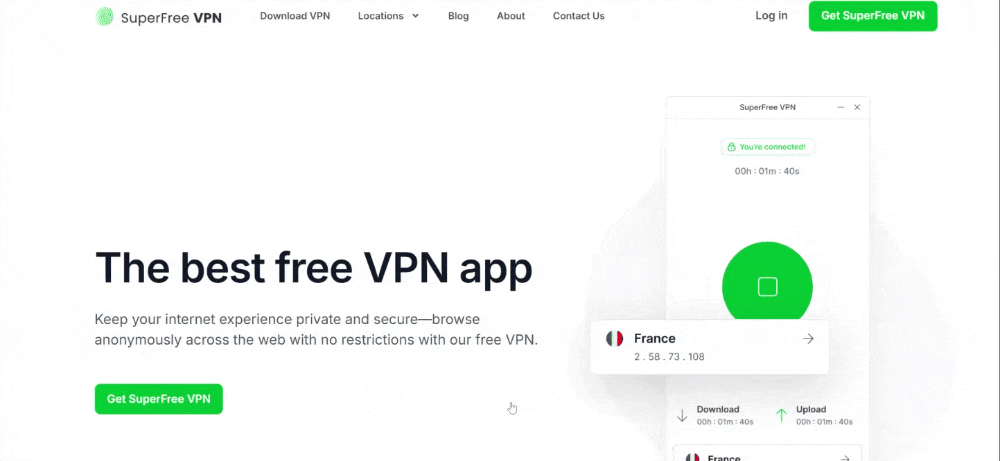
Method 3: Use SuperFree VPN to Access Your Home Network
Want to connect to your Raspberry Pi while you’re away from home, maybe from work, school, or even on vacation? The problem is, your Pi is stuck behind your home internet (thanks to something called NAT), so you can’t reach it directly.
But here’s the good news:
SuperFree VPN can help you skip all the complicated stuff and connect securely to your Pi from anywhere. It’s like creating a secret tunnel from your device straight into your home!
What You Need To Do
- Install SuperFree VPN on your home computer or router (whichever is easier for you).
- Then install it on your laptop or phone that you’ll use to connect when you’re away.
- When you turn it on, it’s like you’re sitting at home – and your Pi is now right there with you.
- Just open the terminal and type: ssh [email protected]
(Replace the IP with your Pi’s local address – you can find it by running hostname -I on the Pi.)
Why This Method is Great

Here’s a closer look at what makes SuperFree VPN a smart and reliable option:
- No need to mess with port forwarding
- Everything is encrypted and safe
- You get access to your whole home network, not just the Pi
- SuperFree VPN is free and super beginner-friendly
| Features | What Makes It Great |
| Completely Free | ✅ No subscriptions, no trials |
| Super Fast | ✅ Without annoying buffering |
| Easy to Use | ✅ The app is simple to install |
| 23+ Global Servers | ✅ Pick from 23+ countries |
| Private & Secure | ✅ Your browsing stays anonymous |
| No Annoying Ads | ✅SuperFree doesn’t interrupt your experience with ads. |
| Top User Rating | ✅ 9.7/10 |
Just a Heads-Up
- Your home computer (where VPN is installed) needs to stay turned on
- If using your router, setup can take a little more time, but it’s a one-time thing!
Method 4: Reverse SSH Tunnel
This one’s for the tinkerers and tech-savvy folks!

If you don’t want to use third-party tools like VPNs, and you’re okay with getting your hands a little dirty in the terminal, a Reverse SSH Tunnel gives you full control over how your Raspberry Pi can be accessed from anywhere.
What You’ll Need:
- A remote server (like a Linux VPS with a public IP)
- SSH access is set up on both your Pi and VPS
- Some basic terminal skills
Setup:
On your Raspberry Pi, run: ssh -R 2222:localhost:22 youruser@your-vps-ip
- -R 2222:localhost:22: This tells the VPS to open port 2222 and forward it to your Pi’s SSH.
- youruser@your-vps-ip: Replace this with your actual VPS login.
Now, from your VPS (or any computer with access to it), you can connect back to the Raspberry Pi: ssh pi@localhost -p 2222
That’s it! You’re in.
Pros:
- Doesn’t require port forwarding on your home router
- Fully manual, so you control every step
- Secure with SSH encryption
Cons:
- Needs a remote server (can be free or cheap, but still external)
- Slightly technical – not ideal for total beginners
- You must reconnect the tunnel if your Pi restarts (or automate it using autossh)
Which Method Is Best for You? (Let’s Compare)
Here’s a quick look at the pros and cons of each method:
| Method | Easy to Set Up | Secure | No Port Forwarding | Free Plan | Best For |
| SuperFree VPN | ✅ | ✅ | ✅ | ✅ | Full network access |
| Tailscale | ✅ | ✅ | ✅ | ❌ | Private VPN setup |
| Remote.it | ✅ | ✅ | ✅ | ❌ | One-click remote Pi |
| Reverse SSH | ❌ | ✅ | ✅ | ✅ | Advanced users |
| Port Forwarding | ❌ | ❌ | ❌ | ✅ | Basic direct access |
Why SuperFree VPN Is the Winner
If you’re looking for a secure, hassle-free, and powerful way to access your Raspberry Pi (and your entire home network) from anywhere, SuperFree VPN is the clear winner.
- No confusing port forwarding
- 100% free to use
- Works for all devices, not just Raspberry Pi
- Perfect for both beginners and pros
Final Thoughts
Connecting to a Raspberry Pi remotely behind NAT can feel tricky at first, but with the right approach, it becomes easier than you think.
Whether you’re a beginner using Remote.it or Tailscale, or an advanced user setting up a reverse SSH tunnel, there’s a fix to this.
Looking for something easy to set up and fully secure? SuperFree VPN is your go-to tool – it’s 100% free, and powerful enough to make your Pi feel local from anywhere in the world.